

How to recover from tooth extraction: Fast Recovery Tips
- Caterina Rutter
- Nov 22, 2025
- 12 min read

A successful recovery boils down to one critical task: protecting the blood clot that forms in the empty socket. This clot acts as a natural bandage. Your action plan is simple: be gentle, use gauze to control initial bleeding, and take your pain medication before the anesthetic wears off. Staying ahead of the discomfort is the key to a smoother experience.
The First 24 Hours: Your Recovery Blueprint
The first day is the most critical for a smooth recovery. Your body's immediate job is to form a protective blood clot over the exposed bone and nerve. If this clot is dislodged, you risk a painful complication called a dry socket, which significantly delays healing.
Everything you do in these initial 24 hours must be aimed at keeping that clot secure.
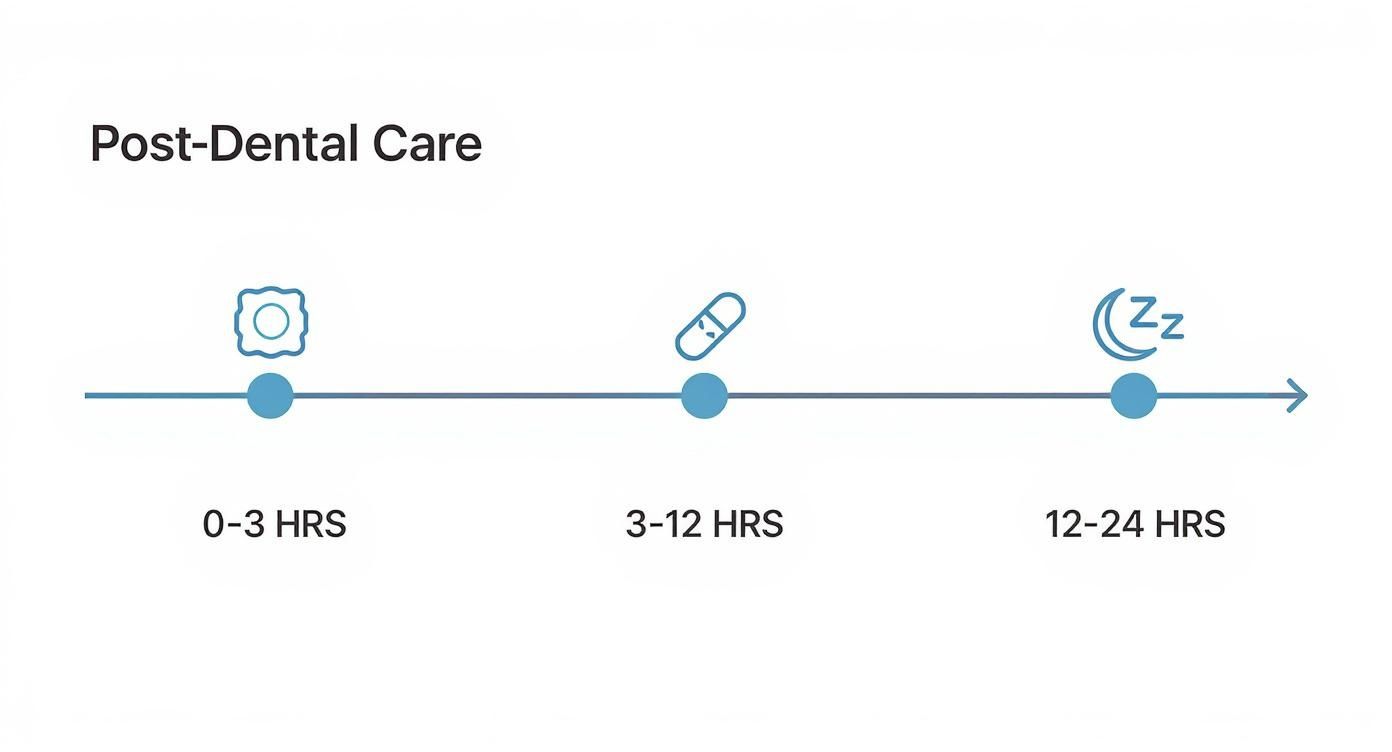
This visual outlines your first few hours, moving from actively managing bleeding with gauze, to controlling pain, and finally, getting essential rest.
Follow this timeline to navigate the first day effectively.
Immediate Aftercare Timeline: The First 24 Hours
Timeframe | Key Action | Important Note |
|---|---|---|
0-1 Hour | Bite down firmly and consistently on the provided gauze. | Do not talk or spit. The pressure is what stops the bleeding. |
1-3 Hours | Take your first dose of prescribed or recommended pain medication. | Do this before numbness fades to prevent pain from starting. |
3-12 Hours | Rest with your head elevated on pillows. Apply ice packs to your cheek. | Use a 20-minutes-on, 20-minutes-off cycle with ice to reduce swelling. |
12-24 Hours | Eat only cool, soft foods like yogurt or smoothies (with a spoon). | Do not use a straw. The suction will dislodge the blood clot. |
Following this timeline closely is the most effective way to prevent complications and start your recovery on the right track.
How to Use Gauze Correctly
Immediately after your extraction, we will place a sterile gauze pad over the site. Your task is to bite down with firm, steady pressure—not a chewing motion, but a constant force to help the clot form.
A survey of 251 patients revealed that while over 54.98% correctly knew to keep gauze in for about 30 minutes, nearly 19% thought it needed to be replaced right away, highlighting the need for clear steps.
Here is your action plan for using gauze:
First 30-45 Minutes: Bite down firmly on the initial gauze pad. Do not talk, spit, or adjust it.
Check and Replace (Only If Necessary): After this time, gently remove the gauze. If active bleeding continues, place a fresh, slightly damp gauze pad over the area and bite down for another 30 minutes.
Know When to Stop: Once bleeding slows to a minor ooze or stops, you no longer need gauze. A little pink saliva is normal for the first day.
My Pro Tip: The goal isn't to constantly replace the gauze. Each time you remove it, you risk disturbing the clot. Use it only as long as needed to control active bleeding.
Getting Ahead of the Pain
The local anesthetic we use will keep you numb for a few hours. The most effective strategy is to manage pain before it starts. Do not wait for the numbness to wear off completely.
Take your first dose of pain reliever about an hour after your procedure. This gives the medication time to activate as the anesthetic is fading, ensuring a comfortable transition.
For most extractions, over-the-counter medications are effective:
Ibuprofen (Advil, Motrin) is often recommended because it reduces both pain and inflammation.
Acetaminophen (Tylenol) is an excellent alternative, especially for those who cannot take ibuprofen.
For more complex procedures, such as impacted wisdom teeth, we may provide a prescription. You can find more specific advice in our guide with wisdom teeth removal recovery tips. Always follow the dosage instructions we provide or those on the product label.
Managing Pain and Swelling Effectively

After the first 24 hours, your body begins the main healing phase. Discomfort and inflammation often peak around day two or three. Knowing how to manage this phase is key to a comfortable recovery.
Do not be alarmed if swelling increases on the second or third day. This is a normal part of your body's inflammatory response and a sign that healing is underway.
Creating Your Pain Management Schedule
To manage discomfort, you must stay ahead of the pain, not chase it. Waiting until pain is severe makes it much harder to control.
If you are using an over-the-counter pain reliever like ibuprofen, take it on a regular schedule for the first few days. This maintains a consistent anti-inflammatory level in your system, preventing pain from flaring up.
Set an alarm on your phone as a reminder. If the instructions say to take a dose every six hours, a timer ensures you don't miss a dose and allow pain to return suddenly.
Mastering Cold and Warm Therapy
Using temperature therapy is a drug-free way to manage symptoms, but timing is crucial.
For the First 48 Hours: Use Cold Therapy
What it does: Cold constricts blood vessels to minimize swelling, numb the area, and dull pain signals.
How to use it: Wrap an ice pack or a bag of frozen peas in a thin towel. Apply it to the outside of your cheek for 20 minutes on, then 20 minutes off. Never apply ice directly to your skin.
After 48 Hours: Switch to Warm Therapy
What it does: Warmth increases circulation, bringing oxygen and nutrients to the site to accelerate healing. It also soothes jaw stiffness.
How to use it: Apply a moist, warm washcloth or a heating pad on a low setting to your cheek for 15-20 minutes at a time, several times a day.
This transition is critical. Using heat too early can increase swelling, while using ice for too long can slow healing by restricting necessary blood flow.
Simple Habits for a Better Recovery
Small adjustments to your routine can significantly improve how you feel.
One of the most effective actions you can take is to elevate your head while you sleep for the first few nights. Lying flat allows fluid to pool at the extraction site, increasing throbbing and swelling. Prop your head up with extra pillows to let gravity assist with drainage.
Finally, prioritize rest. Your body does its most important healing while you sleep. If discomfort is disrupting your rest, consider natural supplements for better sleep. Good-quality sleep is one of the most powerful tools for recovery.
Your Post-Extraction Diet: What to Actually Eat
Knowing what to eat after an extraction is crucial for healing. Good nutrition provides the building blocks for recovery, but your food choices must also protect the healing site.
Your primary goal for the first few days is to eat nutrient-dense foods that require no chewing. This protects the fragile blood clot from anything too hot, spicy, crunchy, or that requires suction.
The First 48-72 Hours: Your No-Chew Menu
Immediately after your procedure, your diet must be entirely liquid or puréed. Stick to cool or lukewarm foods to avoid irritating the extraction site.
Here are actionable food choices for this initial phase:
Smoothies: Blend yogurt, protein powder, and soft fruits like bananas or avocado. Always use a spoon, never a straw.
Lukewarm Soups: Choose creamy, smooth soups like tomato, butternut squash, or potato. Ensure they are warm, not hot.
Yogurt and Applesauce: These require no preparation and are gentle on the surgical site.
Puddings and Jell-O: Simple, soft treats that are easy to eat.
Think of the blood clot as a natural bandage that you must protect. Avoid chips, nuts, seeds, and popcorn, as they can get lodged in the socket and cause infection or dislodge the clot.
Reintroducing Semi-Soft Foods Around Day Four
Around day four, you can slowly begin eating foods with more substance. Choose items that you can easily mash with a fork.
Listen to your body. If you feel any discomfort, it is too soon. Return to softer foods.
Actionable Semi-Soft Food Ideas:
Scrambled Eggs: Soft, high in protein, and easy to eat.
Oatmeal or Cream of Wheat: A warm, filling, and comforting breakfast.
Mashed Potatoes or Sweet Potatoes: A classic soft-food staple.
Flaky Fish: Baked or steamed fish like cod or tilapia that falls apart easily.
Mashed Avocado: A great source of healthy fats that requires no cooking.
For those who don't want to cook, prepared meal delivery services can provide appropriate, healthy meals without any effort.
Foods and Habits to Avoid During Recovery
What you don't do is as important as what you do. For a smooth recovery, avoid the following at all costs.
The Absolute "Do Not" List:
Do Not Use Straws: The suction is the primary cause of a dry socket. Avoid for at least one week.
Avoid Crunchy and Hard Foods: Chips, nuts, popcorn, and hard candies can damage the healing tissue.
Steer Clear of Spicy and Acidic Foods: Hot sauce, citrus, and tomatoes can irritate the extraction site.
No Alcohol or Smoking: Both substances severely impede healing. Smoking dramatically increases your risk of complications.
By following these dietary guidelines, you provide your body with the fuel it needs to heal while protecting the extraction site from setbacks.
Keeping Your Mouth Clean Without Harming the Site
Keeping your mouth clean after an extraction is essential for preventing infection, but it must be done gently. For the first 24 hours, do nothing to the site itself. Let the blood clot form and stabilize. After that first day, you can begin a careful cleaning routine to promote faster healing.

The Gentle Art of the Salt Water Rinse
After 24 hours have passed, begin using a warm salt water rinse. Salt is a natural disinfectant that soothes inflamed tissue. The technique is critical to avoid dislodging the blood clot.
Follow these steps for a safe rinse:
Mix the solution: Dissolve half a teaspoon of table salt into an eight-ounce glass of warm water.
Tilt, don't swish: Take a small amount into your mouth and gently tilt your head from side to side, allowing the water to flow over the site.
Let it fall out: This is the most important step. Do not spit. Lean over the sink, open your mouth, and let the water passively drain out.
Use this gentle rinsing method two to three times a day, especially after eating, to clear away food particles without applying pressure to the socket.
Brushing Your Teeth the Right Way
You must continue brushing your other teeth. Preventing plaque buildup elsewhere in your mouth reduces the overall risk of infection at the vulnerable extraction site.
Treat the healing socket as a "no-go zone" for your toothbrush for the first few days. Brush your other teeth, tongue, and the roof of your mouth as usual, but avoid the extraction area. After three or four days, you can begin carefully brushing closer to the site as tenderness subsides.
A Pro Tip From Our Practice: When you start brushing near the socket, use very slow, deliberate strokes. Your goal is simply to wipe away plaque, not to scrub. This mindful approach prevents accidental bumps that could delay healing.
This is also an excellent time to ensure you are using a clean toothbrush. Knowing how frequently you should change your toothbrush is key to avoiding the reintroduction of bacteria into a healing mouth.
What to Avoid for Optimal Oral Hygiene
Certain habits can undermine your recovery. To ensure optimal healing, you must avoid the following.
Your "Do Not" List for Oral Care:
No Forceful Spitting: Spitting can dislodge the blood clot and cause a dry socket.
Avoid Commercial Mouthwash: Most contain alcohol, which can irritate healing gums. Stick to the salt water rinse until your dentist approves otherwise.
Stay Away from Water Flossers: The high-pressure stream is too strong for a new extraction site and will almost certainly dislodge the clot.
By adhering to these gentle cleaning techniques, you create the ideal environment for a fast and uncomplicated recovery.
How to Spot Complications Like a Dry Socket
Most extraction recoveries are uneventful, but knowing the warning signs of a complication provides peace of mind and empowers you to act quickly. Recognizing a problem early helps prevent it from becoming more serious.
The Dreaded Dry Socket: What It Is and What to Look For
Dry socket (alveolar osteitis) is the most common post-extraction complication. It occurs when the protective blood clot is dislodged or dissolves prematurely, exposing the underlying bone and nerve endings to air, food, and fluids. This exposure causes intense pain.
The key difference between normal pain and a dry socket is its progression. Normal post-operative pain gradually improves each day. Pain from a dry socket gets worse, typically starting around day three or four after the extraction.
Take immediate action if you experience these signs:
Severe, throbbing pain that is not relieved by your pain medication.
Pain that radiates from the socket toward your ear, eye, or temple.
A foul taste or bad breath that persists after a gentle salt water rinse.
An empty-looking socket, where you might see whitish bone instead of a dark blood clot.
If you notice any of these symptoms, call our office immediately. Learn more by reading our guide on what are the signs of a dry socket.
Watching for Signs of Infection
An infection is less common than a dry socket but requires prompt attention. While some swelling and warmth are normal, an infection causes these symptoms to intensify. Look for these red flags, especially after the third day, when normal swelling should be decreasing.
Key Infection Warning Signs
Worsening Swelling: If swelling increases after day three, it is a sign of a problem.
Fever or Chills: A persistent fever after the first day indicates your body is fighting an infection.
Pus or Discharge: Any yellow or white fluid from the extraction site is a clear sign of infection.
Persistent Bad Taste: A foul, salty, or metallic taste that doesn't resolve could indicate an infection.
Use this table to distinguish between normal healing and a potential complication.
Normal Healing vs Potential Complication
Symptom | What's Normal (and When) | What's a Warning Sign (Call Your Dentist) |
|---|---|---|
Pain | Peaks in the first 24-48 hours and gradually improves. Managed by prescribed or OTC pain relievers. | Pain that suddenly worsens after day 3, is severe, throbs, and isn't helped by medication. |
Swelling | Noticeable for the first 48-72 hours, then steadily decreases. | Swelling that increases after day 3, feels hard or hot to the touch, or spreads to the neck. |
Taste/Smell | A slightly metallic or "wound" taste is common initially. | A persistent foul taste or overwhelming bad breath that doesn't improve with gentle saltwater rinsing. |
Fever | A low-grade fever (under 100.4°F / 38°C) can occur on the first day. | A new or rising fever that appears after the first 48 hours, or any high fever. |
Bleeding | Minor oozing for up to 24 hours is expected. | Heavy, continuous bleeding that soaks through gauze in under an hour. |
Appearance | A dark red blood clot fills the socket. Gums may look red and swollen. | The socket looks empty, you can see white bone, or there is yellow/white pus oozing from the site. |
Remember, this is a guide. If you are ever in doubt, call us.
Beautiful Dentistry Pro Tip: Trust your instincts. If something feels "off" or your recovery seems to be moving backward, a phone call to our Tempe office is the right move. We would much rather you call and be reassured than worry at home.
When Other Factors Complicate Healing
For most healthy individuals, following aftercare instructions ensures a smooth recovery. However, pre-existing medical conditions can complicate healing.
For instance, patients with a history of radiation therapy to the head or neck face an increased risk of osteoradionecrosis (bone death). Research shows the 2-year incidence of exposed bone after extractions in these patients was 27%, with higher risks for those needing extractions shortly after therapy.
This is why providing a complete medical history is critical. It allows us to customize your treatment and post-operative care to minimize risks and ensure the safest possible outcome.
A Few More Questions We Hear All the Time
It's normal for specific questions to arise during your recovery. Here are direct answers to the most common concerns we hear from our patients at Beautiful Dentistry.
Can I Drink Coffee After My Extraction?
You must avoid hot coffee for at least the first 24-48 hours. Hot drinks increase blood flow to the extraction site, which can dislodge the blood clot or restart bleeding. The heat can also irritate the tender gums.
If you need caffeine, you can have cool or iced coffee after the first day. Sip it directly from the cup. The most important rule is no straws for at least a week, as the suction is a primary cause of dry socket.
When Can I Get Back to Work or School?
This depends on the complexity of your extraction and your daily activities.
Simple Extraction: If you have a desk job, you can often return the next day, though you will likely be sore.
Surgical Extraction (like wisdom teeth): Plan to take at least two to three days off to allow your body to rest and for initial swelling to subside.
Physically Demanding Jobs: If your job involves heavy lifting or significant physical activity, take a minimum of three to four days off. Increased heart rate and blood pressure can cause throbbing and bleeding at the site.
The best advice is to listen to your body. If you feel tired, dizzy, or are still in pain, take another day to rest. Pushing yourself too soon will only slow down your overall recovery.
Is It Normal for My Gums to Look White?
Yes, it is completely normal to see a white or yellowish film form in or around the socket a few days after the procedure. This is not pus or a sign of infection.
This film is granulation tissue, which is a positive sign of healthy healing. It is the natural scaffold your body builds to create new gum tissue.
However, if this white appearance is accompanied by severe pain, a foul odor, or you can see an empty, bony socket, it could be a dry socket or infection. If you are unsure, call our office.
How Long Until the Hole Closes Up Completely?
Healing occurs in stages. While you will feel much better within a week, the socket takes longer to close completely.
First 1–2 Weeks: The initial gum tissue heals and closes over the surface, reducing the chance of food getting trapped.
First 1–3 Months: Beneath the gums, your body is actively filling the socket with new bone. You may still feel an indentation in your gum line.
Up to 6 Months: The new bone continues to remodel and smooth out. For most people, the site is fully healed and the indentation is barely noticeable after six months.
Tooth extraction is a very common procedure. One study found that by age 25, around 80% of patients had at least one tooth pulled between 2007 and 2016. Discover more details about dental extraction prevalence if you're interested. Understanding the recovery timeline is part of the process.
By following these actionable steps, you are setting yourself up for a smooth and predictable healing journey.
Your smile and your comfort are our top priorities at Beautiful Dentistry. If you have any more questions about your recovery or are ready to schedule your next appointment, our team is here to provide the caring, expert guidance you deserve.
Visit us online at https://zdentist.com to learn more or book your visit today.


Comments