

7 Actionable Wisdom Teeth Removal Recovery Tips for 2025
- Caterina Rutter
- Oct 16, 2025
- 14 min read

Wisdom teeth removal is a common procedure, but a successful recovery depends on what you do after you leave the dentist's chair. A proactive plan can significantly reduce discomfort, prevent complications, and speed up your healing time. Instead of just waiting it out, taking specific, deliberate actions can transform your recovery from a painful ordeal into a manageable healing process. This guide provides a clear, step-by-step playbook for a smoother recovery.
This guide delivers seven actionable wisdom teeth removal recovery tips based on proven clinical practices. We'll move beyond generic advice to give you specific instructions, timelines, and practical actions for each stage of healing. We will cover everything from the correct way to apply an ice pack and manage your medication to a detailed soft food diet that promotes healing without causing irritation.
From the first 24 hours to the following week, these insights will empower you to take control of your recovery, minimize complications like the dreaded dry socket, and ensure a better outcome. At Beautiful Dentistry, serving Tempe, Chandler, and South Phoenix, we believe an informed patient heals faster. This comprehensive plan is your trusted resource, providing the clarity and confidence needed for a successful recovery.
1. Ice Pack Application for Swelling Reduction
Managing swelling is your first mission for a comfortable recovery. Applying cold compresses is the most effective way to do this. The cold temperature constricts blood vessels, which reduces inflammation, eases pain, and provides a gentle numbing effect. This action is most critical in the first 48 hours when swelling is at its peak. Consistent cold therapy during this window will dramatically reduce the "chipmunk cheek" effect and its associated discomfort.

Starting this process immediately when you get home is crucial for getting ahead of the swelling before it starts.
How to Correctly Apply Cold Therapy
To get the full benefit without harming your skin, follow this precise method. The goal is to cool the area, not freeze it.
Follow the 20/20 Rule: Apply the cold pack for exactly 20 minutes on, then take it off for at least 20 minutes. This cycle prevents ice burn while delivering consistent anti-inflammatory benefits. Set a timer to stay on track.
Create a Barrier: Never put a frozen pack directly on your skin. Wrap it in a thin, dry towel or a t-shirt to protect your face.
Apply to Both Sides: Even if you only had teeth removed on one side, apply cold packs to both cheeks. This helps manage overall facial swelling and provides more balanced relief.
Actionable Tip: Start your ice pack rotation the moment you get home. The faster you begin to manage inflammation, the less swelling and pain you'll experience over the next 48 hours.
Types of Cold Packs to Use
You have several easy options for cold therapy.
Specialized Jaw Wraps: Your surgeon may provide a hands-free jaw wrap that holds two cold packs perfectly in place. If so, use it.
Reusable Gel Packs: These are ideal because they stay flexible when frozen and mold comfortably to the shape of your jaw.
DIY Solution: A bag of frozen peas or corn is an excellent substitute. The small pieces conform perfectly to your face for even cold distribution.
After the first 48 hours, switch from cold packs to warm, moist compresses (like a warm, damp washcloth). While ice reduces initial swelling, warmth increases blood flow to help clear up bruising and promote final tissue healing.
2. Proper Rest and Head Elevation
Your body heals best during rest, but how you rest is critical for wisdom teeth recovery. You must keep your head elevated above your heart. This position lowers blood pressure in your head, which directly reduces bleeding and swelling, and helps protect the fragile blood clots in the extraction sites. This simple action is most important during the first 72 hours when your body is working hard to control inflammation.
Lying flat can cause a throbbing sensation and increase swelling overnight. Proper elevation works with your body's healing process, not against it.
How to Achieve Proper Elevation
Your goal is to create a stable and comfortable incline of about 45 degrees that you can maintain while resting and sleeping.
Pillow Stacking: Use two to three firm pillows to prop up your head and upper back. Avoid soft pillows that will let your head sink down during the night.
Use a Recliner: A recliner is a perfect tool for recovery. It provides consistent, sturdy elevation and prevents you from accidentally rolling onto your side or stomach.
Support Your Lower Back: To prevent back strain while sleeping at an incline, place another pillow under your knees. This helps align your spine and improves comfort.
Actionable Tip: Set up your recovery space before you go to your appointment. Arrange your pillows or recliner, and place your water, medication, phone, and remote within arm's reach. This ensures you can rest without interruption.
Helpful Tools for Head Elevation
While pillows work well, these tools can make maintaining elevation even easier.
Wedge Pillows: These triangular foam pillows are specifically designed to provide a stable incline and are a great investment for post-surgical recovery.
Travel Neck Pillows: A U-shaped travel pillow can stop your head from slumping to the side while you sleep propped up, providing extra support.
Adjustable Beds: If you have one, use the remote to set the bed to a comfortable, elevated position.
Prioritizing head elevation is a simple, direct action you can take to reduce the most common post-operative symptoms and ensure a more comfortable recovery.
3. Soft Food Diet and Proper Nutrition
Eating the right foods after surgery is essential for healing, but your mouth will be too tender for a normal diet. A strict soft food diet protects the extraction sites, prevents infection, and gives your body the nutrients it needs. The main goal is to eat foods that require zero chewing to safeguard the vital blood clots forming in the sockets. This is most critical for the first 3-5 days when the risk of dislodging a clot is highest.

Avoiding the wrong foods is just as important as eating the right ones. Hard, crunchy, or chewy foods can dislodge the clot and introduce bacteria into the wound, causing severe pain and a longer recovery.
How to Correctly Approach Your Post-Op Diet
Fuel your body for healing by making smart, deliberate food choices.
Control the Temperature: For the first 24-48 hours, eat only cool or lukewarm foods. Hot foods can increase blood flow and dislodge the clot.
Focus on Nutrients: Your body needs protein and vitamins to heal. Good sources include protein shakes, Greek yogurt, scrambled eggs, and blended soups.
No Straws, No Suction: Do not use a straw for at least a week. The suction can easily pull the blood clot out, causing a dry socket. Eat smoothies and soups with a spoon.
Avoid Problematic Foods: For at least a week, do not eat anything with small, hard pieces that could get stuck in the sockets, such as nuts, seeds, popcorn, or rice.
Actionable Tip: Go grocery shopping before your surgery. Stock your fridge and pantry with approved soft foods like applesauce, yogurt, instant mashed potatoes, and protein drinks so you have easy, nutritious options ready.
Types of Foods to Eat (and Avoid)
Here is a clear list to make meal planning easy.
Eat This: Mashed potatoes, applesauce, smoothies (with a spoon), scrambled eggs, cottage cheese, pudding, Jell-O, and creamy, blended soups. For great ideas, check out these nourishing smoothie recipes that deliver nutrients without requiring chewing.
Not This: Hard bread or toast, chips, pretzels, spicy foods, sticky candy, steak, or anything crunchy.
Around day five, you can start reintroducing semi-soft foods like pasta or soft-cooked fish. Listen to your body—if it hurts to chew, you’re not ready.
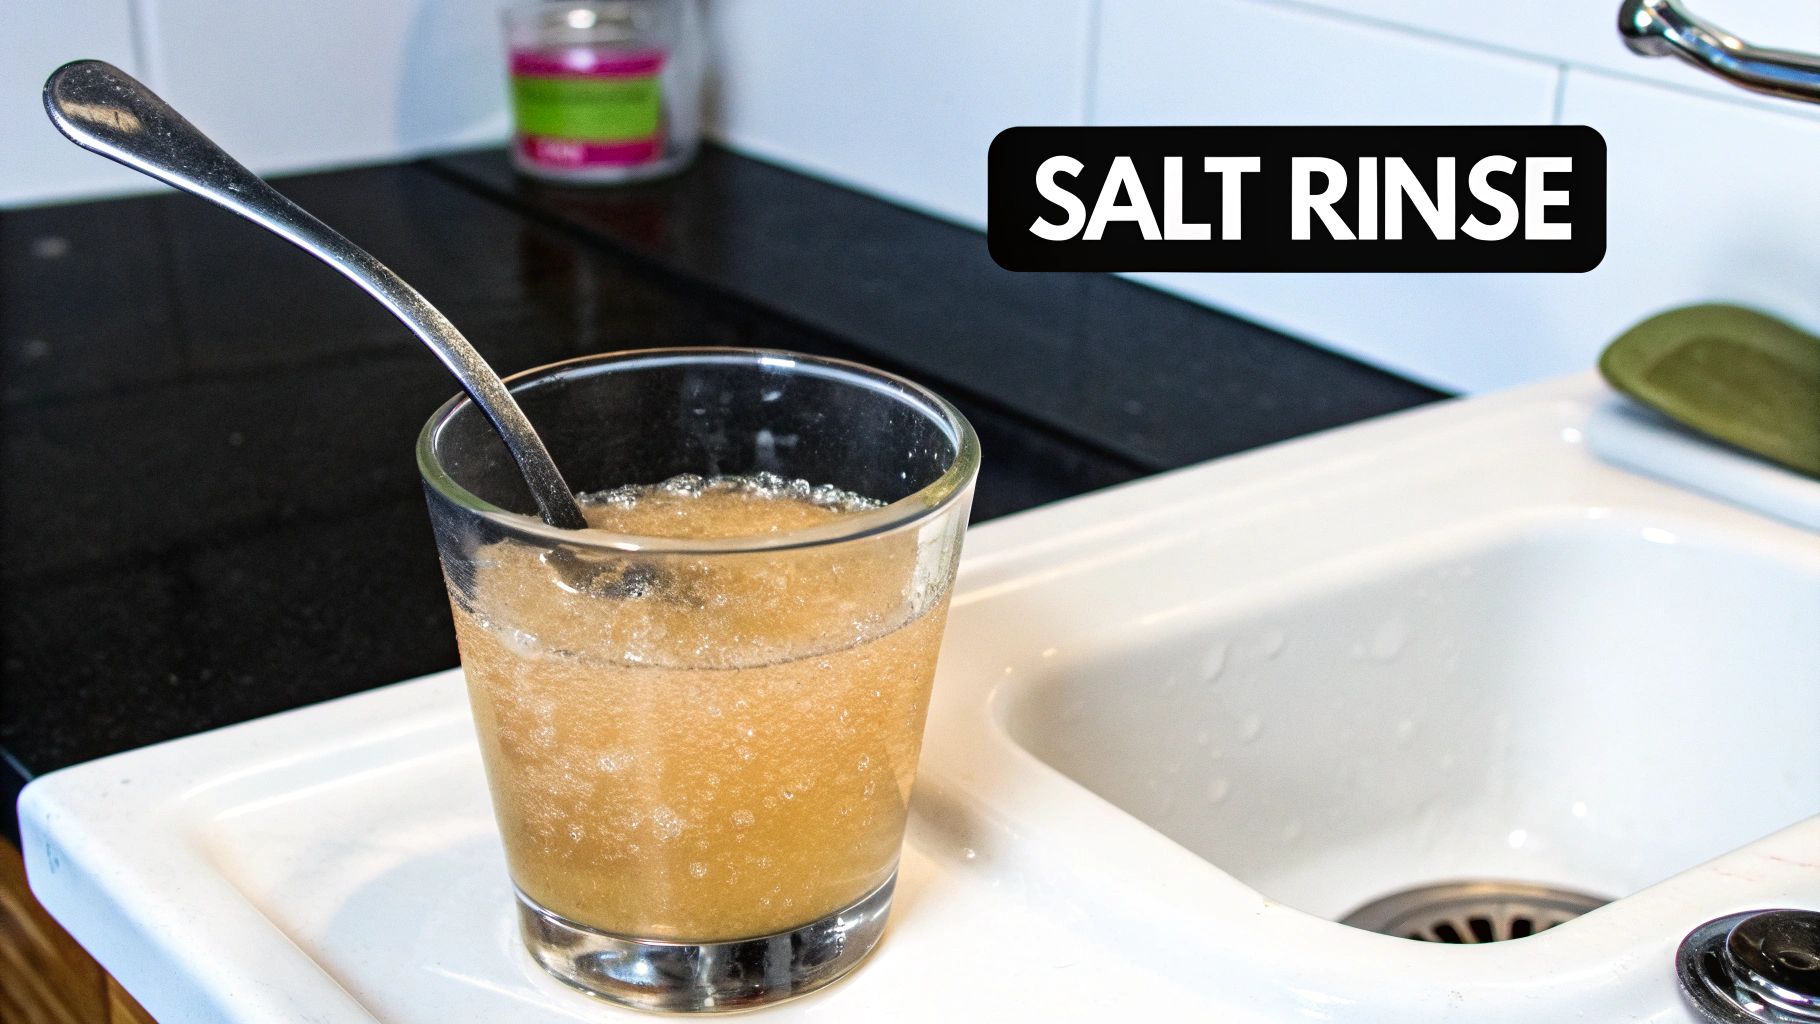
4. Gentle Salt Water Rinses
Keeping your mouth clean after surgery is critical for preventing infection. Gentle salt water rinses are the safest and most effective way to do this. A warm saline solution cleanses the surgical sites without the harsh alcohol of many commercial mouthwashes. The salt creates an environment that naturally reduces swelling and makes it difficult for bacteria to grow. This gentle rinse is essential for removing food particles that can get trapped in the sockets and cause infection.
You must wait 24 hours after your surgery before starting to rinse. This gives the blood clots time to stabilize.
How to Correctly Perform Saline Rinses
Your rinsing technique is crucial. The goal is to gently irrigate, not to swish aggressively.
Wait 24 Hours: Do not rinse your mouth with anything for the first 24 hours. This is the most important period for clot formation.
Use a Gentle Motion: Do not swish or gargle. Instead, gently tilt your head from side to side, letting the warm salt water flow over the surgical sites.
Do Not Spit: Spitting creates pressure that can dislodge the blood clot. After rinsing, simply open your mouth over the sink and let the water fall out.
Actionable Tip: Mix a full day's supply of salt water each morning in a clean, covered bottle or jar. Keep it on your bathroom counter as a visual reminder to rinse after every meal and before bed.
The Perfect Salt Water Recipe
Making the right solution is simple.
The Correct Ratio: Mix one-half teaspoon of table salt into one 8-ounce glass of warm water. Ensure the water is comfortably warm, not hot.
Salt Type: Standard table salt is perfect.
Rinsing Schedule: Rinse after every meal, snack, or drink (other than water), and once more before bed. This consistent cleaning is your best defense against infection. Learn how this fits into a healthy dental routine with these frequently asked questions about oral care habits.
Continue rinsing for at least one week after your surgery. This simple action is one of the most effective ways to ensure a complication-free healing process.
5. Medication Management and Pain Control
Effective pain management is about staying ahead of the pain, not chasing it. A strategic medication schedule is the key to a comfortable wisdom teeth removal recovery. By taking your medication on a strict timetable, you maintain a consistent level of relief and prevent the severe pain that can occur if you wait too long between doses. This proactive approach reduces stress, helps you rest better, and allows you to stay comfortable.
Following your prescribed schedule prevents the peaks and valleys of discomfort, making your overall recovery much more manageable.
How to Correctly Manage Your Medications
Adhering to a strict schedule is the single most effective strategy for controlling post-operative pain.
Set Alarms: Use your phone to set recurring alarms for every dose. Do not wait until you feel pain to take your medication—at that point, it’s much harder to control.
Always Eat First: Never take pain medication on an empty stomach. Eat a spoonful of yogurt or applesauce right before your dose to prevent nausea.
Track Your Doses: Use a notebook or a notes app on your phone to log the time you take each medication. This simple step prevents accidental double-dosing or missing a dose, especially when you feel groggy.
Actionable Tip: Take your first dose of pain reliever immediately when you get home, before the local anesthetic from the surgery wears off completely. This creates a bridge of comfort and prevents the sudden onset of intense pain.
Types of Medication Regimens
Your surgeon will provide a specific plan, but most involve a combination of these medications.
Alternating OTC Pain Relievers: A common and highly effective strategy is alternating between Ibuprofen (Advil, Motrin) and Acetaminophen (Tylenol). A typical schedule is taking 600mg of Ibuprofen, then taking 500mg of Acetaminophen 3-4 hours later, and repeating this cycle.
Prescription Medications: If needed for more severe pain, your surgeon may prescribe a stronger, non-opioid medication or a limited amount of an opioid for breakthrough pain. Use these only as directed.
Antibiotics: If you receive an antibiotic, you must finish the entire course, even if you start feeling better. Stopping early can allow the infection to return stronger.
Do not drink alcohol while taking pain medications. By strictly following your medication schedule, you take direct control over your comfort and create a much better healing environment.
6. Avoiding Dry Socket Through Proper Care
Preventing a dry socket is the most important thing you can do to ensure a smooth recovery. A dry socket occurs when the protective blood clot over the extraction site is dislodged, exposing the underlying bone and nerves. This is an intensely painful complication that will set your recovery back. While it only affects a small percentage of extractions, the risk is much higher for impacted lower wisdom teeth. Prevention is entirely about protecting that blood clot for the first 5-7 days after surgery.
Following the rules to protect the clot is not optional—it is the key to avoiding severe pain and a delayed recovery.
How to Prevent a Dry Socket
Your mission is to avoid any activity that creates suction in your mouth or could physically disturb the clot.
No Smoking or Vaping. Period. This is the most important rule. The suction from inhaling is a primary cause of dry socket, and the chemicals in smoke and vapor destroy healing tissue. You must avoid all forms of smoking for at least 72 hours, but a full week is better.
Do Not Use Straws or Spit: For at least one week, drink directly from a glass. Do not use a straw. When you need to rinse, let the water fall gently from your mouth into the sink instead of spitting.
Rinse Gently: When you begin salt water rinses after 24 hours, do not swish. Gently tilt your head from side to side to let the water flow over the sites.
Avoid Strenuous Activity: For 3-5 days, do not go to the gym, lift heavy objects, or do anything that significantly raises your heart rate. Increased blood pressure can pop the clot out of the socket.
Actionable Tip: Circle the first five days post-surgery on your calendar and treat them as a "no-suction, no-strain" zone. Remind yourself that every straw you avoid and every gentle rinse is a direct action to prevent severe pain.
Diet and Hygiene Considerations
Your daily habits directly impact your risk of dry socket.
Stick to Soft Foods: Only eat foods that don't require chewing. Hard or crunchy foods can break up the clot, while small foods like seeds or rice can get stuck in the socket and cause infection.
No Hot or Carbonated Drinks: Hot liquids can dissolve the clot, and carbonation can dislodge it. Drink cool or lukewarm beverages.
Brush Carefully: You can and should brush your other teeth, but stay far away from the extraction sites with your toothbrush for the first few days.
Leave the Site Alone: Do not touch the extraction site with your tongue or fingers. Let it heal in peace.
Knowing the warning signs is also important. If you experience severe, throbbing pain that gets worse a few days after surgery, it might be a dry socket. Learn about the specific symptoms and what a dry socket feels like so you can call your dentist immediately if you have concerns.
7. Gradual Return to Normal Activities
Jumping back into your routine too soon can cause bleeding, swelling, and other setbacks. A phased return to normal activities is essential for a complication-free recovery. Physical exertion raises your heart rate and blood pressure, which can easily dislodge the blood clot protecting your extraction site. Your body needs time and energy to heal; pushing yourself too hard diverts those resources and puts stress on the healing tissue.
Plan for a 7-10 day period of taking it easy. The key is to listen to your body—if an activity causes pain or throbbing in your jaw, stop immediately and rest.
How to Correctly Phase Your Return to Activity
Follow this timeline to safely reintroduce activities.
Days 1-2 (Total Rest): No strenuous activity. This means no working out, no heavy lifting, and no bending over. Your only job is to rest on the couch or in bed with your head elevated. This is the most critical period for clot formation.
Days 3-5 (Light Activity): You can start introducing light activity, like a slow walk around the block. You can likely return to a desk job or school, but avoid the gym, sports, or any physical labor.
Days 5-7 (Moderate Activity): You can gradually increase your activity level, but still avoid intense workouts, contact sports, or heavy lifting.
After Day 7-10 (Return to Normal): Most patients can return to their normal exercise routine after the first week, but check with your surgeon at your follow-up appointment first.
Actionable Tip: Block out at least 3 full days on your calendar for recovery before your surgery. Inform your work or school. Planning for downtime ensures you won't feel pressured to do too much, too soon.
Navigating Specific Activities
Different activities require different timelines.
Work/School: Plan for a minimum of 2-3 days off if you have a desk job. If your job is physically demanding, you may need a full week.
Exercise: No gym or strenuous exercise for at least 3-5 days. When you return, start with light cardio and see how you feel.
Oral Hygiene: Resume gentle brushing of your other teeth after 24 hours. Be extra careful to avoid the extraction sites. Maintaining good oral hygiene is critical; learn more about bad habits that could harm your teeth to protect your dental health long-term.
Diet: A gradual return to normal food is also key. Progress from liquids to soft foods, then to semi-soft foods, and finally to your normal diet as your jaw allows.
The following infographic provides a clear visual timeline for recovery.
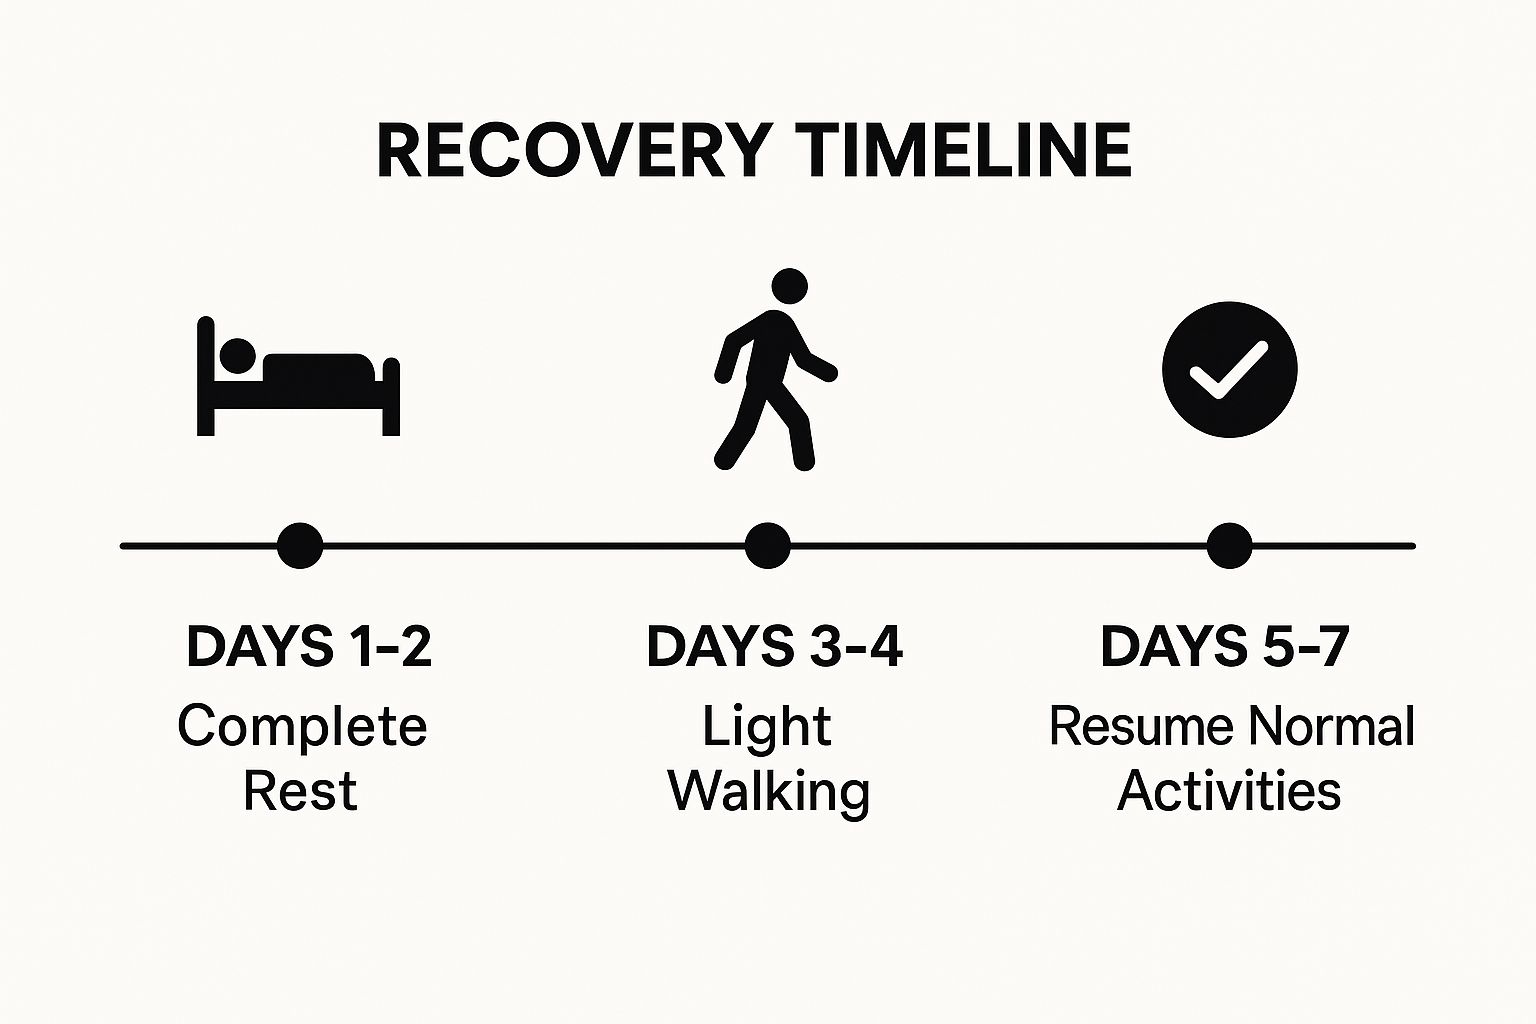
This guide shows the importance of complete rest in the first two days before slowly reintroducing light and then normal activities. Always attend your scheduled follow-up appointment to get the official all-clear before resuming your life without restrictions.
7 Essential Wisdom Teeth Recovery Tips Comparison
Item | Implementation Complexity 🔄 | Resource Requirements ⚡ | Expected Outcomes 📊 | Ideal Use Cases 💡 | Key Advantages ⭐ |
|---|---|---|---|---|---|
Ice Pack Application for Swelling Reduction | Low - simple repeated application | Low - ice pack or frozen peas | Reduces swelling up to 50%, pain relief | Immediate post-op swelling control (first 48 hrs) | Non-invasive, drug-free pain relief, inexpensive |
Proper Rest and Head Elevation | Low - maintaining position while resting | Low - pillows or recliner | Reduces swelling, bleeding, and dry socket risk | Post-surgery rest for 3-7 days | Prevents complications, promotes clot stability |
Soft Food Diet and Proper Nutrition | Moderate - requires meal planning and preparation | Moderate - soft, nutrient-rich foods | Protects sites, supports healing | First 5-7 days post-extraction requiring minimal chewing | Nutrient support, reduces trauma to extraction site |
Gentle Salt Water Rinses | Low - simple daily rinsing routine | Low - salt and warm water | Reduces bacteria, promotes healing | Oral hygiene maintenance starting 24 hrs post-surgery | Natural antibacterial, inexpensive, reduces infection |
Medication Management and Pain Control | Moderate to High - scheduled medication adherence | Moderate - prescriptions and OTC meds | Effective pain and inflammation control | Pain management through recovery period (especially days 2-3) | Facilitates rest, prevents infection, reduces stress |
Avoiding Dry Socket Through Proper Care | Moderate - behavioral modifications and vigilance | Low - no special materials | Prevents dry socket, severe pain, infections | Critical first 48 hrs post-surgery to avoid complications | Simple, cost-free prevention, improves healing timeline |
Gradual Return to Normal Activities | Moderate - requires patient self-monitoring and patience | Low - mainly time and activity adjustments | Reduces complications, improves recovery | Phased resumption of normal physical and oral activities | Prevents re-injury, guides safe activity progression |
Partnering with Your Dentist for a Successful Recovery
You are now equipped with an actionable toolkit for a smooth and speedy wisdom teeth removal recovery. This journey is not about passively waiting to feel better; it's about actively participating in your own healing. By implementing these seven core strategies, you become an empowered partner in your dental wellness.
The first 72 hours are the most critical. Diligent ice pack application, maintaining head elevation, and sticking to your medication schedule are your primary defenses against swelling and pain. Think of this initial period as setting the foundation for the rest of your recovery.
From Survival to Proactive Healing
As you move past the acute phase, your focus shifts from symptom management to proactive healing. This is where your specific actions make the biggest difference.
Nutrition as Fuel: Your soft food diet isn't a limitation; it's a strategy to provide your body with the fuel it needs to repair tissue without damaging the surgical sites. Protein shakes, yogurt, and blended soups are your best tools.
Creating a Clean Environment: Gentle salt water rinses are your most effective method for maintaining hygiene when brushing isn't possible. This simple action significantly reduces infection risk by keeping the area clean.
The Dry Socket Defense: Actively avoiding actions that cause suction, like using straws or smoking, is your most important job. Protecting that blood clot is the number one factor in preventing severe pain and recovery setbacks.
These actionable insights are the building blocks of the best wisdom teeth removal recovery tips. They empower you to take control, minimize complications, and get back to your life faster.
Your Long-Term Oral Health Journey
While your immediate recovery is the priority, this is also a chance to focus on your overall oral health. The link between oral bacteria and systemic health is well-established. To support your long-term health, exploring an oral health masterclass for comprehensive dental care can offer valuable insights into managing your dental wellness beyond this procedure.
Ultimately, your greatest resource is your dental team. Every patient's recovery is unique. Your surgeon's instructions are tailored specifically to you. Do not hesitate to call their office if you experience concerning symptoms, such as a fever, pain that worsens after day three, or bleeding that won't stop.
By combining the practical wisdom teeth removal recovery tips in this guide with the expert care of your dental provider, you are set up for an optimal outcome. You have the knowledge and the plan; now, you can execute it with confidence. Your successful recovery is in your hands.
If you are in the Tempe, Chandler, or South Phoenix area and seeking a dental team that prioritizes patient comfort and provides meticulous post-operative care, we invite you to connect with us. At Beautiful Dentistry, Dr. Martin Sobieraj and our team specialize in gentle wisdom teeth removal and guide you through every step of a successful recovery. Visit Beautiful Dentistry to schedule your consultation and experience our commitment to your health and well-being.


Comments